Wednesday, June 25, 2014

Creamy Lemon Pasta Side

My local grocery store had a huge pasta sale so I decided to go and buy a bunch of neat ones, that I don't usually use.  I found a campanelle box and figured I'd make it for supper, as a side to our sausage-dogs.  

First: Made the pasta al'dente & drained: 

While pasta is cooking - I started the sauce:
Heat up 2 C half/half cream
1 tsp beef bouillon granules
1/4 C lemon juice
Salt & Pepper
Parsley
Onion powder

 Also: Cook a pkg of bacon, cut into small pieces.
Once bacon is done & sauce is hot:

Add in a can of sweet peas,  
Stir it all together:

Eat & Enjoy!!


Friday, June 20, 2014

Pork, Potatoes & Tomatoes

I guess, some days I just feel like making beans & weenies and some days I want to be adventurous and make things I've never tried before.  I found a new recipe on facebook for pork tenderloins and pinned one for mash-potatoe-cakes.  So I decided to try them both and add in some Parmesan tomatoes.  None of these were my own recipes, I copied straight from the original posters.... so here's the links & few things I've added or changed: 

Pork: 

I made the pork according to the directions - however, in the end I wanted more 'sauce'.  So I mixed in the cooking juices along with a blop of brown sugar and a good squirt of yellow mustard.  It was not as thick as I wanted it, but it was delicious way to top the pork!

Mashed Potato Cakes:

The ONLY thing I changed here was that I used panko bread crumbs to the mixture instead of some flour.  It gave it a good crunch and seemed to hold it together better.

Parmesan Tomatoes:

The one thing different I did with these is I don't bake them, as it says.... I just pop them under the broiler until they look crispy and done.  YUMMY!


Everything turned out wonderful and tasted delicious.... I just wish it wasn't all sort of, the same color.  I know you've heard me say it before.... my food may not always LOOK correct or great, but it tastes good.  LOL. 

Enjoy!


Sunday, June 15, 2014

Camping: Dessert Apples

So... I wanted to also find a simple dessert that wasn't too heavy.  My boys will sit and eat apples all day if I let them, so I decided to find an easy apple dessert.  Searching all my pins - and success!!

INGREDIENTS:
Apples: peeled and sliced, not too thin
Few tablespoons of lemon juice
Brown sugar
Marshmallows
((Forgive me for not measuring my ingredients.... by now you should know I don't like to measure unless it's absolutely necessary.  lol))

DIRECTIONS:
* Peel and slice apples ahead of your camping trip.  Lightly coat with few tablespoons of lemon juice to keep them from browning.  (I made my apples the day before camping and we ate them on day 2 of  camping and they still weren't brown.  Yay!)
* Place all your apples in a pot safe to use on the grill, or over an open flame
* Put a good amount of brown sugar on top of the apples.... I'd say I did about a cup over my 5 apples
* Top with a handful of marshmallows.... stir all together.
* Cook over the grill until the apples are tender then devour!!

Man.... my boys were SO happy eating this... warmed up their tummies on such a chilly camping night!


Camping: Ranch Salsa Chicken

Super easy.... that's what's important when you're camping.  It's supposed to be relaxing and calming and a nice time.  So complicated food takes away the 'chill' nature of it.

SO.... foods that appear complicated but aren't are my favorite while camping.  Again, I scoured the internet (mostly pinterest) and found a good chicken recipe.  

INGREDIENTS:
You're favorite salsa (mine was a homemade recipe I made a few days earlier, had tomatoes, green peppers, black beans & corn in it.  I let it sit for a day before eating it, then mix in some coumin, garlic powder, chopped onions & 1/2 pkt ranch seasoning.  YUMMY!!)
Chicken breasts
Water

DIRECTIONS:
* Pour water into a tin dish (or whatever you plan to use while camping & grilling)... about 1 cup will do
* Place chicken in the dish
* Top with your salsa
* Cook over fire until done.  If the water is gone, add a little more to keep chicken cooking & juicy
* When you serve it, scoop the salsa on top of the chicken. 
* Eat & Enjoy!


Camping: Chips

Sometimes you just need a bag of chips!!


Camping: Breakfast Burritos

I've read many, many blogs.... posts.... pins about what to make when you go camping.  Lots of them were directions on how to make breakfast burritos.  Yum!  So I've combined what I liked most about each one and made them!  They were delicious!  

Make Ahead:
Brown 1 lb your favorite ground sausage (I added in 1 can of black beans at the end)
Make 1/2 bag of hasbrowns (season as desired)
Bake 18 scrambled eggs, add chives & seasons as desired


** Roll the burritos together and wrap in tin foil before you go **
Sausage
Hashbrowns
Eggs
Shredded Mild Cheddar Cheese

Once you're camping and it's time for breakfast, just throw them on the grill.
Ours got a bit black, but it added to the flavor.  
YUMM!!


I used a whole bag of cheese & made 7 burritos... I think, I'd use more cheese in the future, so it 'glues' everything else together a little better.  You cook, you learn.  
=)


ENJOY!

Thursday, May 29, 2014

PB&J Crunchy French Toast Sandwich

Again... like I've said before, I like Guy Fieri!  I was watching an episode a few days back and it was a fried foods special.  I thought, this one will be good to watch, but I should stay away from all the fried-goodness he's showing us.  HOWEVER - this morning, I just happen to have all the things to make one of the dishes and my boys were being good.  So then I thought, I'll make a 'special' peanut butter and jelly sandwich for them, for breakfast, since they absolutely love PB&J's!  I was unable to find Guy's original recipe from the show, but it wasn't too difficult, and I figured I could remember and wing my way through it.  So.... YUMMY.... here it is!! 


Peanut Butter and Jelly Crunch French Toast Sandwich

I crushed up 1/2 box of frosted flakes really well in my Ninja chopper.  Placed it in a large bowl.


Next I whisked together 1 1/2 C milk, 4 eggs (I'm making 4 sandwiches), cinnamon and vanilla extract.


Now it's time to make the sandwiches.... like normal.  My boys usually use grape jelly, but for this, I used strawberry preserves.  YUM!


Then.... just like french toast (sort of) I carefully dipped each sandwich into the milk/egg mixture then the frosted flakes mixture.  Making sure to gently press the cereal onto the sandwich, in hopes of them adhering.

Next melt a good sized blob of butter in a medium sized skillet.... about 1 - 2 Tbsp of butter.  Once melted and the skillet is super hot (but butter NOT burnt) put the sandwich in.  Try not to be a flipper.... or it'll just soak up the butter and not get crispy.  Let it sit for a bit... until slightly golden on the bottom.  Then flip and heat until golden brown on both sides.


 Once it's finished - I LIGHTLY salted the top of the sandwich and let it cool.  
I then cut it into small squares.


Once they were room temperature, we all sat down with our totally un-healthy sandwiches and glasses of milk..... and ENJOYED every bit of it!  


Each one of my boys asked if we could have it again tomorrow.... then again after.  I had to, sadly, tell them no.  There's no way we can eat this more than once every 6 months.... 
However, it was SUPER DELICIOUS!!  
SUPER, DUPER DELICIOUS!!!


Thursday, May 22, 2014

Rhubarb Jam

So.... I got another batch of rhubarb picked and it was another hefty load!  Yay!!  I'm going to do something fancy with some of it, but thought since I had so much, I'd make jam out of it.  I have this thing with jams and butters - - I DO so enjoy making butters and jams!!

Super easy... for the most part.  (Note: I'm not canning this... just making it to use it right away.)

Add 5 cups of chopped rhubarb to a large pot on stove.
Next add 2 cups of white sugar.

Then add 3/4 cup of orange juice & turn onto med/high heat.

Keep an eye on it -- bring it to a boil then let simmer for a long time.
The rhubarb will become soft and start falling apart - - yay!!
I let my simmer for close to 3 hours, stirring it quite a bit from time to time,
then put it aside and let it cool.  

Once it's completely cooled, I put it in a jar.


I also put some on toast and ate it with my boys - - it's a bit sweet and sour, it was wonderful!!!


Monday, May 19, 2014

Roasted Red Pepper Pesto

Oh my gosh I love pesto!  I never did much research on it, so never really understood why it always came in such a tiny jar, but cost so much.  Well, I also love roasted peppers, so decided to make roasted red pepper pesto.... and thus had to do my research.  WOW - are pine nuts expensive!!  Now it makes sense.

However, while doing my research, I realized that many recipes have alternative nuts... almonds, cashews (also expensive), walnuts.  Pretty much saw all the nuts, except peanuts..... Shoot!  I needed an excuse to buy those glass jars of peanuts that my grandpa used to eat ~ I love salted peanuts!  Anyhoo - - I settled on combining a few recipes that called for almonds - and my budget was happy.

In this endeavor, I also learned how to roast my own peppers.  Yay me!!  Here's how I did it....

1) Cut, seed, gut 3 red bell peppers....  laid them skin side up on a pizza pan. (Apparently was supposed to use a cookie sheet - however I do not have one, as I am HORRIBLE at making cookies, so I don't buy cookie sheets.  hehehe.)

2) Placed the peppers about 8 inches from the top of my oven, & put my setting to broil.  Let them broil roughly 15-18 minutes, until they were a bit soft and charred, and smelling delicious.

3) Put them all in a ziplock bag and let them steam for about 10 minutes.  After.... this is what I had....


Now.... time to make my pesto!!.... 

INGREDIENTS:
3 roasted bell peppers
1 pkg of fresh basil
1/4 C slivered almonds (I used just a bit more than this, maybe)
1 tsp minced garlic
1/4 C grated Parmesan cheese (or in my house.... "shaky cheese")
S & P to taste
Squirt or 2 of oil (to get things moving)

DIRECTIONS:
1) Place all ingredients (except oil.... for now) in my Ninja food processor.


2) Blend while slowly adding the oil, to get things moving.  

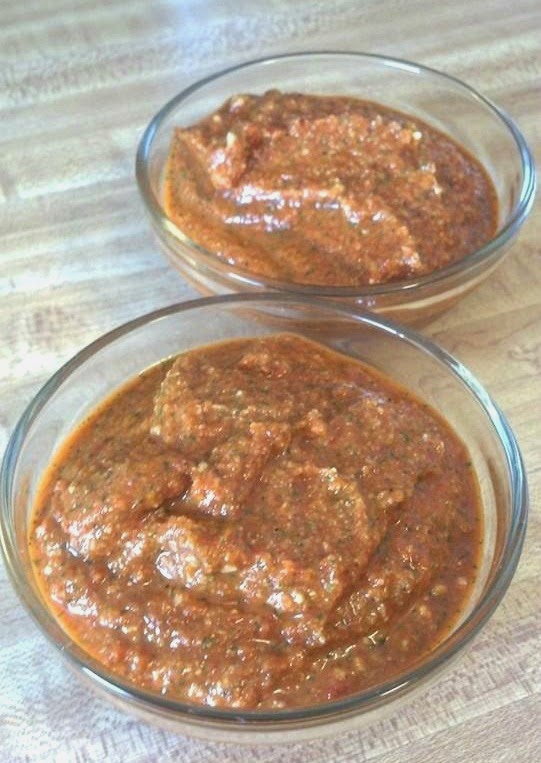
It's that easy and delicious!!  


Well.... I had a reason for making this pesto - I wanted to make a fancy (dare I say, gourmet) sandwich for supper tonight.  In the end - I'd say it was a complete success!! 

IN THE SANDWICH:
French loaf - cut diagonal & toasted with garlic butter & parsley
Crispy bacon strips
Italian marinated then grilled chicken breast strips
Hefty layer of spinach leaves
Mild Cheddar cheese slices
 Top & bottom insides of sandwich smothered in my red pepper pesto
..... Then all of it in the oven for a few minutes to melt the cheese and heat through.  

I'm SO proud of this sandwich.... I'll pat myself on the back for this one.
YUMMY!!!


Saturday, May 17, 2014

Spinach Artichoke Dip

There's something quite annoying yet entertaining about Guy Fieri.  I like him, but he does bug the mess out of me sometimes.  My oldest boy and I can sit for hours, watching Diners, Drive-Ins and Dives on any normal day.  Today, however, I saw him on another show - Big Bite, where he made a Swiss Chard & Artichoke dip.  I thought that looked amazing and wanted to replicate it, however my grocery store did not cooperate.  So I was forced to make a few alterations, yet it still turned out wonderful!! 


INGREDIENTS:
4 tablespoons unsalted butter, plus more for greasing the baking dish
2 tablespoons minced garlic
4 slices thick-cut applewood-smoked bacon, diced
8 cups (lightly packed) roughly chopped spinach
One 14-ounce can artichoke hearts, drained, rinsed, roughly chopped
1/4 cup fire-roasted tomatoes, drained and finely chopped
4 tablespoons all-purpose flour
2 cups milk
1/4 cup ricotta cheese
1/2 cup cream cheese, softened
1 cup shredded mozzarella cheese
1/4 cup grated Parmesan, plus extra for topping
Kosher salt and freshly ground black pepper

Tortilla chips, for serving


DIRECTIONS:
Preheat the oven to 375 degrees F.

Heat 1 tablespoon of the butter in a medium saute pan over medium heat. Add the garlic and cook until fragrant, 1 to 2 minutes. Add the bacon and cook until crispy and browned, another 5 minutes.


Add the spinach and cook until wilted, stirring occasionally, 4 to 5 minutes. Stir in the artichoke hearts and tomatoes and heat through, 1 minute.


In a deep pot, melt the remaining 3 tablespoons butter over medium-high heat. Add the flour and cook, whisking, until golden, 2 minutes.


Lower the heat to medium and slowly pour in the milk while whisking; cook, whisking constantly, for 5 minutes. Add the sauce to the spinach mixture.


Stir in the ricotta, cream cheese, mozzarella and Parmesan. Taste and add salt and pepper as needed.


Transfer the mixture to a greased 9-by-13-inch baking dish.


Sprinkle with some grated Parmesan and bake until golden brown and bubbly, 20 minutes. Serve warm with tortilla chips for dipping.

~ ~ 

I would have liked to use the swiss chard that Guy suggests but it was nowhere to be found in my little town.  Sad face.  So spinach was the best call replacement.  It turned out great!!  Even my picky eaters ate it! 

Hope you like it, as well! 


Thursday, May 15, 2014

Rhubarb Custard Cake


I have about eight mounds of rhubarb in my garden (which is otherwise pretty scarce due to the horrible weather here in South Dakota!) and I've noticed it's screaming at me to be picked.  I went out and got a little over 10 cups of rhubarb picked.... still leaving much more to enjoy later!  (I'm a newbie when it comes to growing/picking rhubarb... these just happen to come with the house we've recently moved into.  Yay me!)

So I decided to spend quite a while on Pinterest with a specific search in mind - this time.  Rhubarb recipes!!  I could make the same 'ol cake I already know how to make, but I thought I'd change things up a bit, since I know I'll have more opportunities to make wonderfulness later.  I came across this wonderful custard type cake.... made a few alterations and it turned out amazing!!! 

INGREDIENTS:
1 box cake mix - vanilla flavor (and all necessary items to make cake)
sprinkles of nutmeg
roughly 3 C of chopped rhubarb
1 1/2 C sugar 
2 C of vanilla coffee creamer

DIRECTIONS:
1) Make cake according to instructions and sprinkle a bit of nutmeg into the batter.  

2) Pour into greased cake pan... I wanted them to be more bar-ish than thick cake-ish, so I split my batter into a normal sized cake pan and a smaller size brownie pan.  That way, I would have more rhubarb-to-cake ratio - - tartness is wonderful!

3) Mix together the chopped rhubarb and all the sugar.... let sit for a moment, then pour over the batter.  Do not mix or stir into the batter.  Just plop it on top.


4)  Carefully pour the creamer on top of the rhubarb.  Again, do not mix or stir... just let it sit.


5)  Bake 'cake' according to the box instructions... when a toothpick comes out clean, it's done, like always.  


** The rhubarb and cream will form a custard-like yumminess and sink to the bottom... the cake bakes to the top and comes away from the sides of the pan.  So don't expect it to look exactly like your normal cake will, when it comes out of the oven.  


My boys ate this up!!  It's not too sweet or sugary like some desserts turn out to be - - and the rhubarb gives it just enough tartness to make you happy!!  

YUM!! 
Enjoy!